Account Connection
How do I connect my account in Reachingly?
Connecting mailboxes is the first step to sending campaigns and running warmups. Reachingly supports Google (Gmail & Google Workspace), Microsoft (Outlook/Office 365), and any provider that offers IMAP/SMTP.
Quick start (all providers)
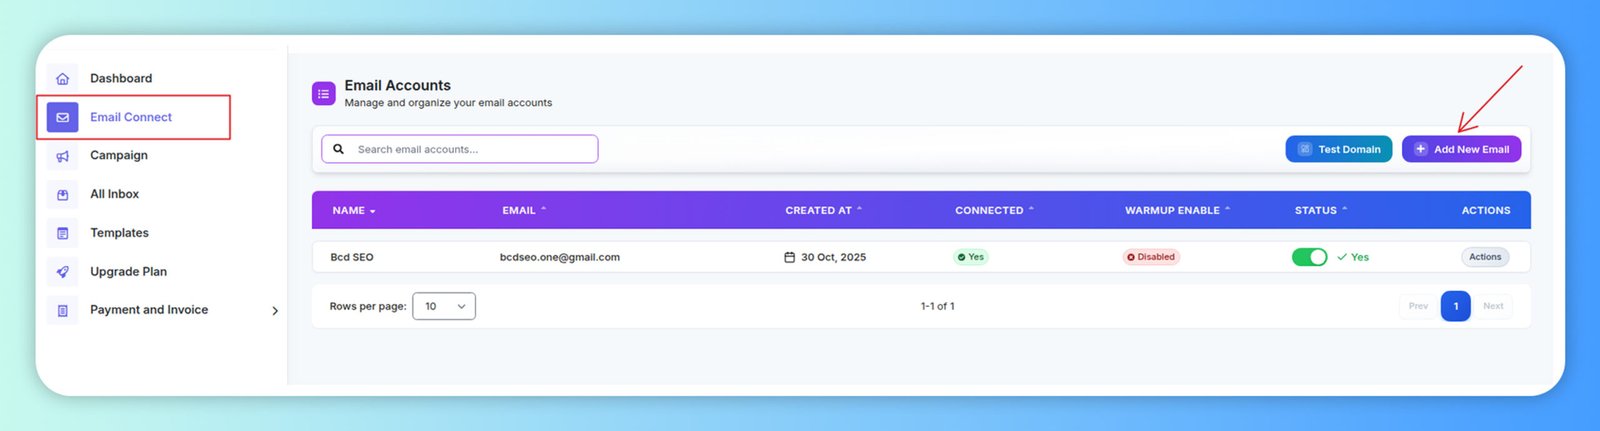
- In the left sidebar, open Email Connect.
- Click Add New Email.
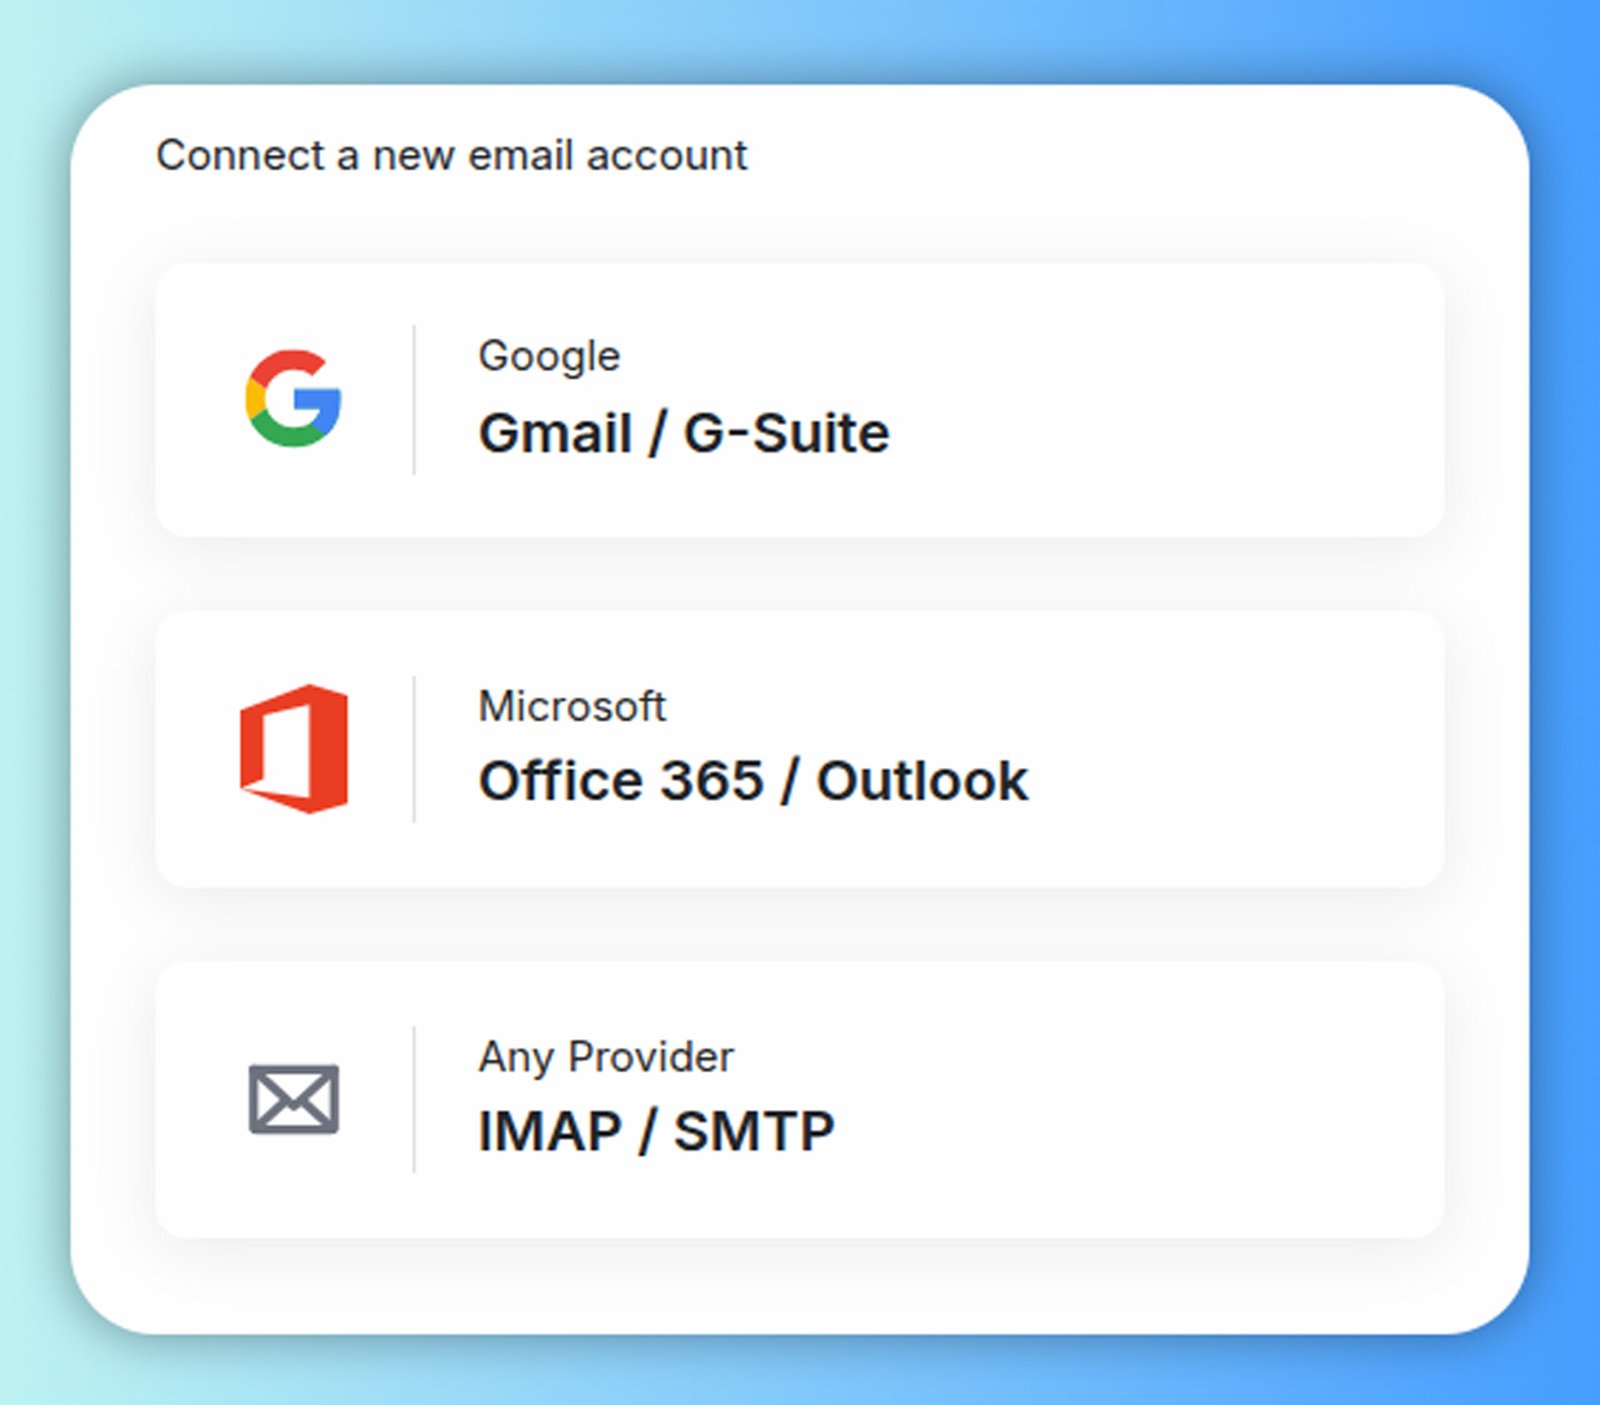
- Choose a connection type: Google, Microsoft, or IMAP/SMTP.
- Complete the steps for your provider (below).
- After a successful test, set:
- From Name & signature
- Daily send limit
- Warmup (on/off)
- Tracking & unsubscribe settings (optional)
You can connect as many mailboxes as your plan allows. Each mailbox has its own warmup and sending limits.
Connect a Google mailbox (Gmail & Google Workspace)
To connect your Google accounts, please follow the steps below:
-
Go to the Email Connect
on the left sidebar menu.
- Click Add New Email.
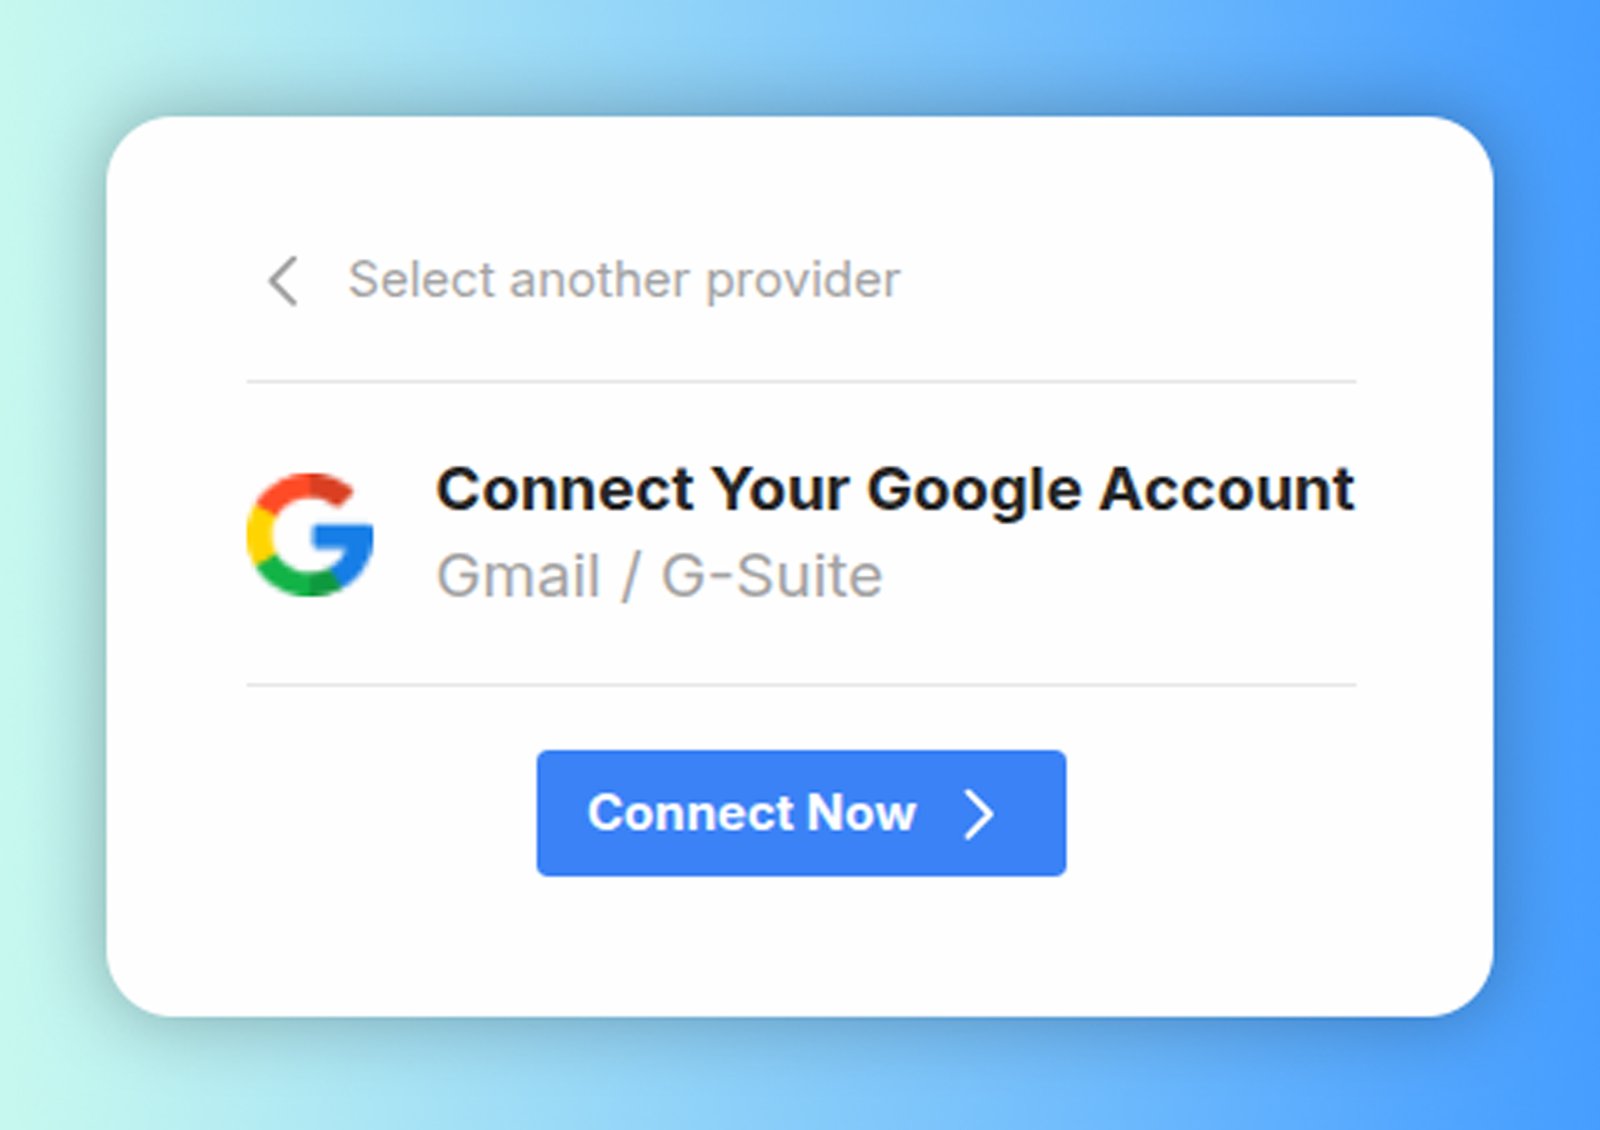
- Choose Google.
- Select your any google account.
-
Review the reachingly.ai Privacy Policy and Terms of Service
and continue.
-
Select all what reachingly.ai can access
and continue.
-
Your account now adds
in the Reachingly email account section.
Connect a Microsoft mailbox (Outlook / Office 365)
To connect your Microsoft/O365 Account, please follow the steps below:
-
Go to the Email Connect
on the left sidebar menu.
- Click Add New Email.
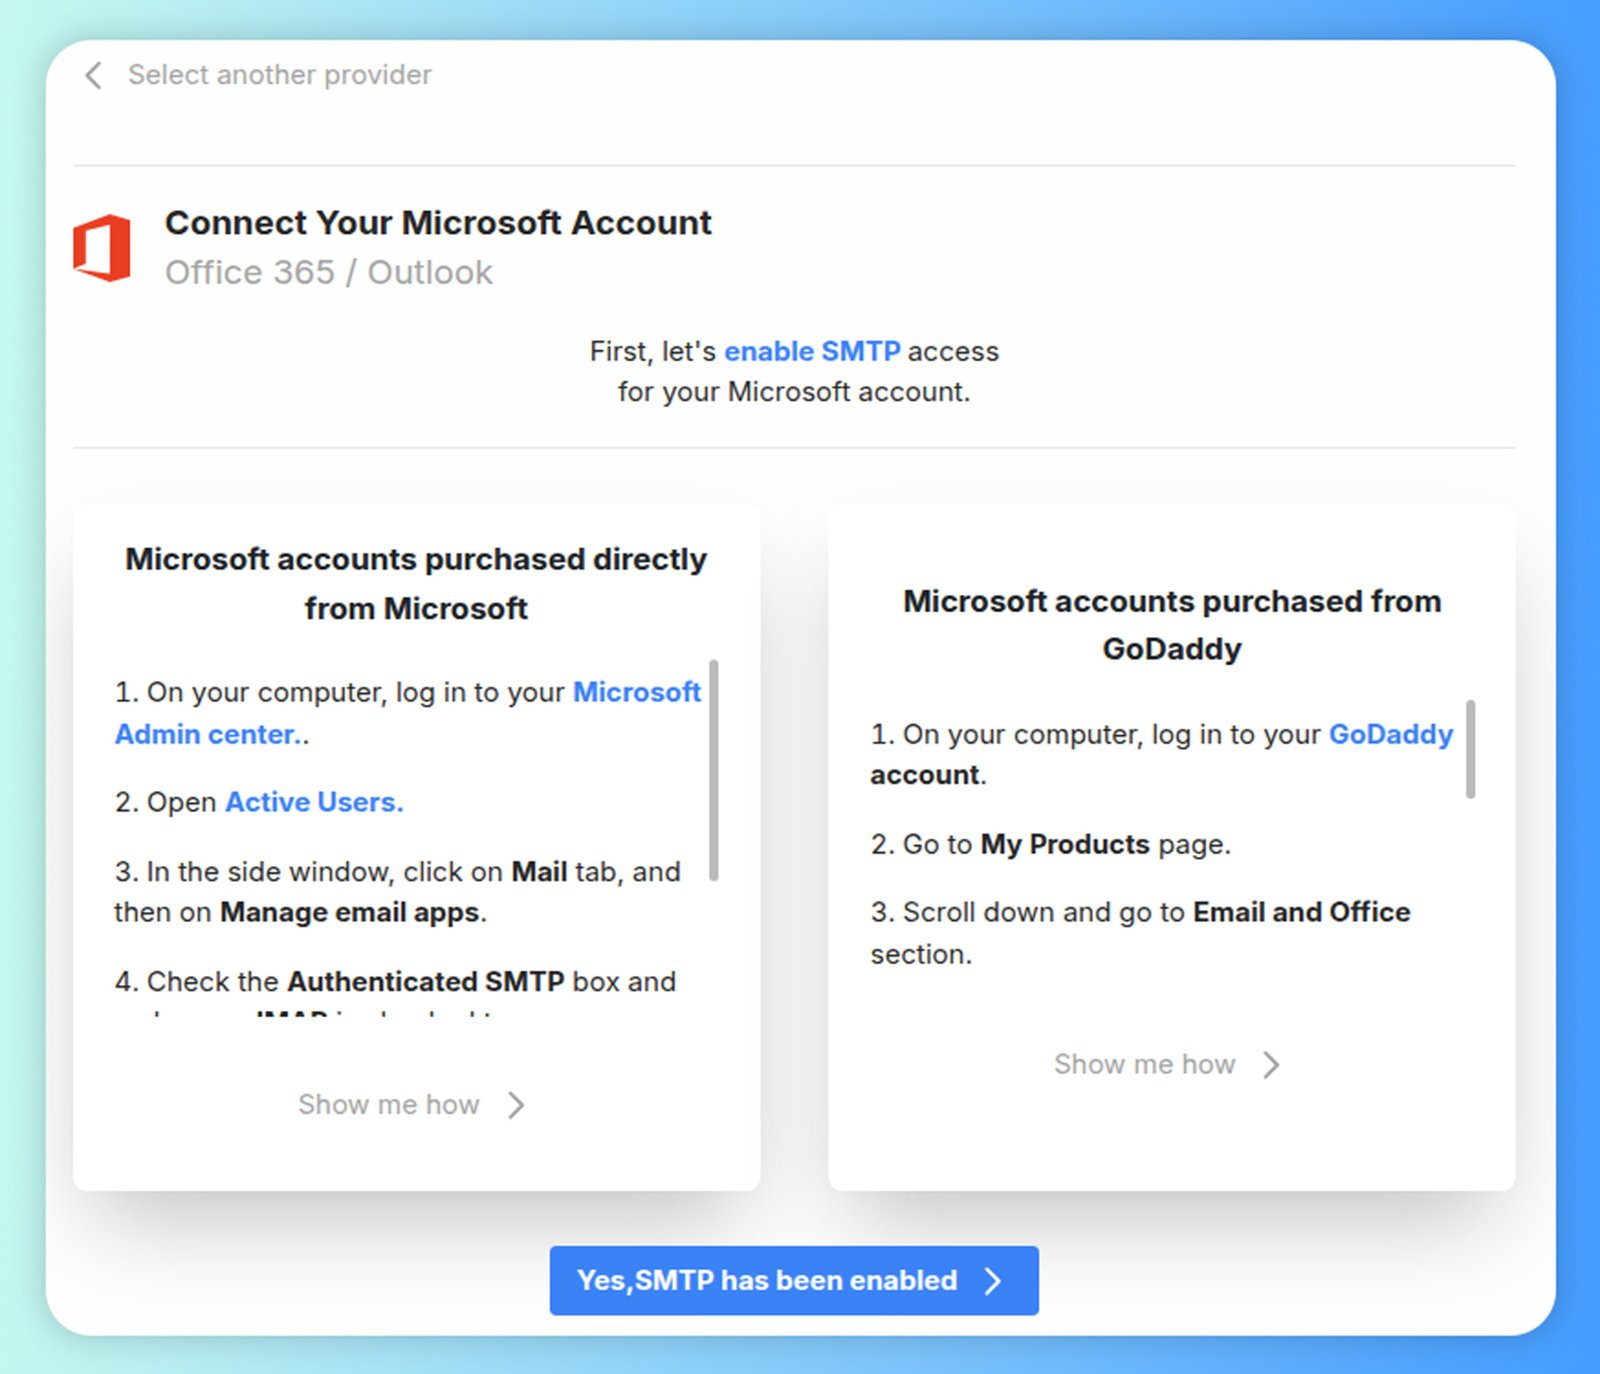
- Choose Microsoft.
-
Enable SMTP access
for your Microsoft account
-
Follow the prompt
to complete the connection.
If SMTP is disabled by your tenant: Ask your Microsoft 365 admin to enable SMTP AUTH for the mailbox (or organization-wide) and retry. Modern authentication is required; legacy/basic auth is not supported.
Note: Because Microsoft requires per-mailbox consent, Microsoft inboxes must be connected one at a time.
Connect other providers (Custom IMAP/SMTP)
Use this when your mailbox is hosted by your own server or a third party (e.g., Zoho, Namecheap, cPanel, FastMail, ProtonMail Bridge).
-
Go to the Email Connect
on the left sidebar menu.
- Click Add New Email.
- Choose IMAP/SMTP.
-
Enter your First Name and Last Name
and Email.
-
Next enter your Username, Password,
SMTP host and Port.
-
Your account now adds
in the Reachingly email account section.
Troubleshooting Connection Issues
If you encounter problems while connecting your email account, try these solutions:
Common Connection Issues
- Incorrect Credentials: Double-check your email address and password. If you've recently changed your password, make sure you're using the updated one.
- Two-Factor Authentication: If your account has 2FA enabled, you may need to generate an app-specific password for Reachingly.
- IMAP/SMTP Disabled: Some providers disable these protocols by default. Check your email provider's settings to ensure IMAP and SMTP are enabled.
- Firewall or Security Settings: Corporate or institutional email accounts may have security settings that block third-party applications. Contact your IT department for assistance.
Provider-Specific Solutions
For specific issues with different email providers, refer to our detailed troubleshooting guides:
Managing Connected Accounts
Once you've connected your email accounts, you can manage them from the Email Connect section:
Viewing Account Status
The Email Connect dashboard shows all your connected accounts with their current status:
- Connected: The account is successfully connected and ready to use.
- Needs Attention: There may be an issue with the account that requires your attention.
- Disconnected: The account is not currently connected and needs to be reconnected.
Editing Account Settings
To modify settings for a connected account:
- Go to Email Connect in the left sidebar.
- Find the account you want to edit and click the three-dot menu.
- Select "Edit Settings" from the dropdown menu.
- Update the necessary fields (From Name, Signature, Daily Send Limit, etc.).
- Click "Save Changes" to apply your updates.
Disconnecting an Account
If you need to disconnect an email account from Reachingly:
- Go to Email Connect in the left sidebar.
- Find the account you want to disconnect and click the three-dot menu.
- Select "Disconnect" from the dropdown menu.
- Confirm the disconnection when prompted.
Disconnecting an account will stop all campaigns and warmups for that account. Make sure to pause or complete any ongoing activities before disconnecting.